I
thought I would give a more complete explanation of how I do my wax
work, or at least how I'm doing the models for the botanicas.
I
start with a square of wax 4” x 4” x 1” thick made by pouring
melted wax into a prepared form or mold.

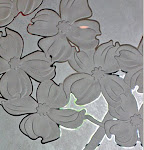
First
I select my image. I have a folder full of close up pictures of
flowers that I collect. Once I pick my image, I convert the
photograph into a line drawing.


Next
I deconstruct the line drawing into layers...bottom layer being the
parts of the image that are furthest away, next layer being the next
most forward elements, the third layer the next most forward
elements, and so forth. It averages about 4 layers.

Then
I use a copy of the line drawing to cut out each layer out of a 1/8”
sheet of wax. We make these by pouring melted wax on a hydrated
plaster 'bat', a round or rectangular shaped slab of plaster about
1/2” thick. The wax won't stick to the hydrated plaster.

Once
that is done, I stack the layers on the block and seal the edges
together and the layers to the block using a rubber tipped or wood
tool. Everywhere two pieces of wax come together, the join must be
sealed or else plaster will flow into unwanted spaces later.


After
all the layers are stacked and joined together, I have a rough, flat
3 dimensional form that is ready to be carved into it's final shape.
These
are the tools I use to do that...small wire tools, large wire tools,
metal carvers, and miscellaneous wood tools and rubber tipped tools.

I
use them to carve away big amounts or shave away small amounts.
Sometimes I add wax and reshape.


When
I'm satisfied with the main carving, then I go back with my small
wire tools and make small adjustments.
Sometimes,
depending on the piece, I will go over the finished carving with
'scrubbie' after all the carving and cleaning up is done before I
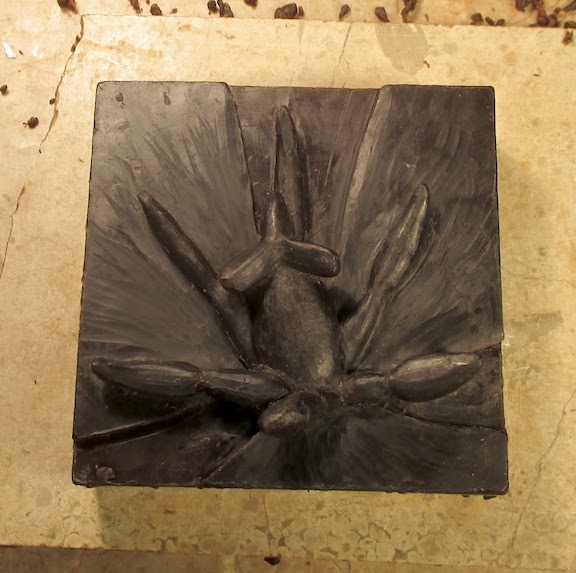
smooth it all out, which I have done here.

The
last step is smoothing the wax. For this I use naptha, a solvent
like lighter fluid. Using either my finger tips or a small piece of
chamois or the rubber tipped tools, I try to go over the whole
surface. Finally, I textured the stamens by stippling them with a
small tool.

I
kind of hurried on this one as I wanted to finish it today for the
post but also because tomorrow I work at the antique store and I
don't want it to linger. I'll go over it one more time as I can see a
few areas that need attention but this one is done.
And
so am I.


this was so COOL! thanks for sharing that process! lots of pieces, lots of time, lots of details, lots of adjustments.
ReplyDeleteso you'll have to show what happens the rest of the way when you do it. :)
I thought it was chocolate at first.
ReplyDeleteVery interesting. Only an artist can see that beautiful floral in a block of wax. And you are indeed a fine artist.
ReplyDeleteLovely! I've never tried using a scrubby without the solvent--I like the texture it imparts. I tend to do this kinda stuff by eye-- your way is a lot faster and more precise.
ReplyDeleteThank you.
Have you taught classes about this? Your explanation was detailed and clear. I have wondered about your process and now I understand all the steps involved. Thank you~
ReplyDeleteA lot of steps to get that finished product. I have done some jewelry with lost wax when I was in college.
ReplyDeleteThis is wonderful! I am such an admirer of your work. Thank you so much for sharing.
ReplyDeleteI am saving this FANTASTIC post, Ellen. You have such a simple way of explaining such complex artistic process. One day, one of my characters might do something like this... maybe a pretty lady with an awesome hat who has been dancing around my mind...
ReplyDeleteLove that thoughtful look, by the way. ;-)
Amazing and thank you for a wonderful explanation.
ReplyDeleteCool to see the process!
ReplyDeleteThanks Ellen, yes it was good to see this part of the process too - especially as it has carving in! Wasn't referring at all to your ability to be clear, rather my capacity for slow to grasp! Love seeing your tools and process.
ReplyDelete