Showing posts with label making. Show all posts

Friday, February 24, 2017

back to wax


I've had several days now when it has been raining or too wet to work outside since I finished the last wave of pieces, when I didn't have any other errands or distractions, when it would have been a good day to start on some new work, when I sat there with my model making stuff and then walked away. I finally figured out what the problem was. I was trying to start something I didn't really want to do. I was thinking I need to make some small stuff for consumption instead of working on what I was really interested in working on, what I was thinking about when I thought about it. So I finally got started. I'm going to work on the moon series and the feather/beach series and the big rock with the lizard and the 10 petal anemone that has occupied my thoughts. The lizard with the 10 petal anemone will be expensive. Well, it's all expensive.

By getting started, I mean I made some wax sheets for the moon blank I already prepared and a blank for the next feather/beach piece. I've decided to do the moon pieces differently, completely differently, not even cast but fused, so this blank is no longer the standard for the series. I'm going to do it as a stand alone piece.

I did make another hibiscus wax because I'm not entirely happy with the red one, my complaint mostly being that it is red, not a color I am comfortable with. And I wasn't really happy with the stamen.

It's still pretty wet outside as it's only been two days since the big storm and rainy Monday even though the sun is shining and the birds are chirping. It's a day that tempts you to be outside so I imagine I will find some little things to do, like fire ant remediation, but my main goal is to start the full moon piece.

Noon on Thursday and it's already hot outside. In the sun. In the shade with a bit of breeze is nice.

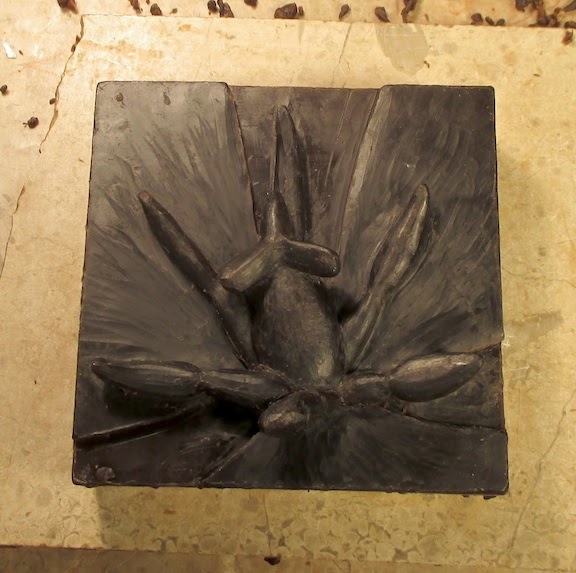
My progress at the end of the day.


Wednesday, August 31, 2016

my arthritic joints are crying


Things are going to be a bit boring around here as I've started on the fabrication for the A&M job cutting the stencil for the first panel which I have already changed from the diagram which is an altered mess. It's got as much white-out on it as it does ink. Been working on it two days so far and might finish it today. 


It's a short day though (yoga) and there are a couple of other things on the agenda. Like decide on and box up and send off a piece to a gallery for their annual anniversary show, something I should have done already. That alone could take all day.

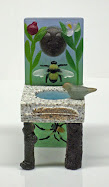
I did make some progress on the finish work on the cast pieces but have not got anything finished. Well, maybe the pink flower with the bee and the leaflet. They are done but I still have to glue them together. 4"w x 5"h x 2"d


Friday, July 29, 2016

a bit more politics and a guardian


I let politics in to write my last post and became obsessed, well, until my daughter walked in Sunday late afternoon and figuratively thumped me upside the head. Why do you want to fill your head with all that garbage, she asked. Why indeed. Two days wasted.

I've watched some of the Democratic Convention. First time ever. I watched Al Franken's speech and some of Bill Clinton's speech and wish I had watched the whole thing but, you know, life intervenes. Missed Michelle's speech but I hear it was what we would expect from her, and listened to Joe Biden and our wonderful President, Barak Obama, who both gave great speeches.

I tried to watch some of the Republican convention, also first time ever, but I couldn't tolerate the obvious false empire-in-ruins dialog they were touting, the fear they were trying to encourage, the promise to 'be tough', and every example they gave implied that it was Hillary Clinton's fault. It makes you wonder, right? How much trouble they take to vilify that woman. And how long they have been at it. Corrupt, evil, liar, killer, untrustworthy. This is the most investigated woman, person, in this country, probably in history. Millions, many millions of dollars have been spent to find one thing, any thing and not one single indictment. Nobody is that powerful. And that's what it is and has been about...power. And who has it and who they don't want to get it. She's been getting in their faces and forcing change since she came of age. I want to do a piece on Hillary but I don't want it to be this so...moving on.

I have, still, been reading some of the political shit on FB but I have, for the most part, stopped commenting or even reading the comments and when I do comment I never, well, hardly ever, go back and read any replies.

So this is also going on. My youngest grandgirl is here for her week. She's 15 this year, the latter years of Granny Camp. The grand boy basically lives here though he's at home this week. The twins already spent a month this summer in Poland and Israel so they need to work the rest of the summer though we are on a mission next Sunday. So Robin has been here since Sunday and I haven't taken a single picture I just realized. We are building a driveway guardian bottle tree totem. We won't finish before she leaves but at least we are started. Got the holes drilled today with Marc's help. This is sort of what we're doing but it won't look exactly like this. Mine's going to have wings and a plate flower 'head'.


I saw that one when my sister and I went out to Glen Flora to an estate sale which was next door. So Robin and I drove out to Glen Flora to get a better look at it and maybe even go knock on the door. As it turned out, it was starting to rain when we got there and the guy came out as I was walking up and we stood in the garage and talked while Robin and Minnie waited in the car. Turns out he is a metal sculptor/artist and he was very forthcoming with how he made it and offered to make the metal armature that anchors it in the ground for me for mine. And he collaborates with other artists to help them with stands and stuff for their work. Which is great because I have been looking for someone local who could help me with that.


So that's why I haven't been around much.


Thursday, October 29, 2015

spirit week


I got a phone call Saturday evening from my grandgirl Jade and she called to say she and her twin Autumn didn't have to work on Sunday and they wanted to come out and do some crafts. This week is spirit week at their high school and they wanted to decorate some shirts to wear on different days. It was still raining from the storm so depending on the weather Sunday morning, I would come get them. As it turned out, it was still raining Sunday morning and to save myself two hours in the car I decided to just gather up all the stuff I had that I thought we could use and $50 and went to their house. A couple of trips to the nearby craft store and the girls got to work with a little bit of help and guidance from me. And I do mean 'little', mostly referring to the driving and paying part though I did help with the layout of some of the shirts.

Every day of the week has a different theme and Monday was something to do with pride in America or something so the twins and their friend wanted to do the American flag across three shirts. We measured the field for the stars and taped off the stripes and they sponged on fabric paint.


For another day's theme that had something to do with math or science (mathletes), Autumn and Hannah wanted to spell out NERD and GEEK using the periodic table. They found the symbols (though Autumn fudged a little leaving the 's' off the center symbol Es and Hannah settled for 'nerdy') they wanted, printed them out and then made stencils by cutting out the large letters and hand painted the other info.


while Jade made a referee shirt for that day's theme.


Thursday, March 5, 2015

moving on and fixing up


botanica erotica 20 partially filled mold

I filled the last Botanica Erotica mold this past Tuesday. The final four went in the kiln yesterday. I feel detached from these last four. I still did all the fussy work but I'm less emotionally involved in how they turn out. It's like, I'm done with these so as long as they don't come out terrible, I won't be disappointed. So far, I am only really disappointed by two of them. I do still want to do one more about 18 – 20” square but I want to use clay for the model and the weather is going to have to be warm for that and also I don't feel any real urgency to do it. Which is good since I have three, possibly four, etched glass commissions pending.

botanica erotica 19 partially filled mold

I guess I'm going to be working on two new bodies of work at the same time for a while, well, after I get all the cold work done on the pieces in progress. I have a collection of ideas for pieces titled River Stories that I want to do and also the 9 x 9 idea in which each 'piece' will be 9 variations on a theme. For instance, 9 different tree barks.

Some of the things we discovered after buying the new shop 'as is' is that the toilet leaked from the bottom and that the walls and windows leak in places so that when it rains, we get puddles on the floor and nothing can go against the walls in those places. We haven't really figured out where the leaks are. I think it's at the top where the walls join the roof as there is no eave whatsoever and I hope a little judicial sealing will take care of it. So far it's either been too hot, too cold, raining, or too busy on the good days to test out my idea.

The windows were leaking from bad putty so I set about to reglaze the two windows in the big bay area of the shop yesterday, scraping out the old stuff and cleaning the dirty rusty metal framing. I got one done and then the other one 2/3rds of the way done and it started raining. The one window did not leak and I don't know if it was because the caulk was hardened enough or because it didn't leak in the first place. But the one I was working on did and now I am going to have to scrape out parts of it and start over when it's dry.

While I was working on the windows, Marc was pulling up the toilet, cleaning it, and resetting it with a new seal. So now we don't have to run back to the house to use the bathroom which is a major improvement, especially in the winter when it is really cold and windy, like today. We had two warm days this week, still overcast, and then the temperature plunged to the high 30s last night and it's going to be even colder tonight. 

 It's March. It shouldn't be getting this cold still. I'm beginning to think that 5 days of spring we had were just a cruel joke.


Tuesday, November 18, 2014

filling the molds


Friday I intended to get at least two molds filled. I got one done, the simple bee. It took me a while to get set up, trying to decide where in the shop, but get set up I did, got my colors out and measured and my tools and I reached for the gum arabic solution I mix with the dry frit...and no gum arabic. It was at home in the refrigerator.

When I went back to get it, it had a big hunk of nasty looking mold floating in it. Fortunately Marc was on his way into the city so I called him and he brought me back some new. In the meantime, I used a very small amount of a different bottle of gum arabic I had left over from a printing with powder sort of lithography technique class I took. I'm sure it will be OK. I could have used Karo syrup which burns out clean. Later, in the middle of measuring out more glass frit, the battery on my scale died. So off to the store for a new battery.

On top of all that, when I opened my notebook I saw that it has been over a year since the last time I filled a mold and while I hadn't completely lost my skill set, I was a little rusty.

The bee is very detailed and takes over an hour just to get the frit in the negative bee space. Here, the frit is flush with the surface. The colors have to be built up from here because the frit packed into the negative space contains a lot of air and as the glass melts it sinks down so to be sure the proper color fills the entire space after firing, the frit has to be built up at least as high as the negative space is deep.


Here I am starting to add in the background/block color, building up the bee colors as well.


Most of the frit I use is size 'fine' which is about the same consistency as sand. Sometimes, I will use powder for really tiny areas like the toes of the lizard though here I have noodled fine frit into those toes. I don't usually like using powder because it comes out more chalky looking. And sometimes I will use size 'medium' frit, which is about the size of minced garlic, for backgrounds but mostly I use the size 'fine'.

I did manage to remember to photograph the lizard on the bark throughout the process. I think I have posted about filling molds before but it's been a while so here it is again.

the mold and the colors for the lizard and the acorn

filling in the lizard

this chameleon will be changing colors

building up the frit and filling in the acorn

lizard and acorn complete

laying in the color for the bark

bark color filled in

a thick layer of size medium clear frit to allow for a soft illumination from the sides

a thin layer of white for the very bottom

Now they are ready to go in the kiln where it will take about three days to heat up, cast, and cool down.


Friday, November 14, 2014

mold making and the Friday selfie


Here's an example of the reproduction molds we use. These are RTV, room temperature vulcanization Part A Part B rubber. These were made from plastic toys like Bag-O-Bugs from the toy store. I make molds of things I find in nature too like rocks and acorns and sticks (I have a butt load of stick molds) and tree bark and shells and other stuff.


You can also use a liquid silicone or latex or silicone caulk. I use all these materials depending on what I am making a mold of and how long I want it to last. The latex molds have the shortest life and take the longest to make.

After I'm done with the model and it is glued down (because it is not heavy enough to not float in the mold mix) with the piece of styrofoam (extra space to hold the crushed glass), Marc paints on isopropol alcohol which acts as a bubble release so that air won't get trapped on the surface of the model and create holes in the mold.


If I am worried about air getting trapped during casting, I will sprue the small, narrow, or deep parts. The blue wax wires will become tunnels that let the air escape to the top of the mold.


Next he builds a dam around the piece


and then pours a mix of hydro-cal plaster, silica flour, and water around the model until it is covered by the mold mix.


Then it sits until it has set, about an hour, and he removes the glass pieces that comprised the dam from the hardened plaster mold.

Now the model is encased in plaster and the next step is to remove it.

styrofoam has been removed

He places the mold wax side down on a piece of hardware cloth over a pan of boiling, steaming water. A bucket over it will help hold and direct the steam into the mold and melt the wax out.


the ready, steamed out molds

This is why it is called a lost wax process, because we are losing the wax model after the mold is made.

We also lose the molds which are called 'waste molds', to answer your question Steve, because they can only be used one time. Most of my work has deep undercuts so the only way to get the finished casting out of the mold is to destroy the mold which is very soft after firing. If the model were perfectly drafted, it would just fall out of the mold and then the mold could be reused. In that case, we would use a different stronger mold material formula.

One last step before I start to fill the molds...measure the volume and convert it to grams of glass. I do this by weighing a container of water, then pouring water into the mold up the the 'fill' point, weigh the container of water again, find the difference and multiply by the specific gravity of the glass to get the amount of grams (or ounces depending on what unit of measure you use) needed to make the casting.


So, here is me, bundled up in the shop on the coldest day of the season so far to start filling molds. I could have done it in the warm house except I have already moved all my frit (crushed glass) over here. Actually, it's not that bad now that the sky has cleared and the sun is warming up the metal building.


Wednesday, October 15, 2014

one day has been pretty much like the next


This has been the content of my days for the last few weeks...sculpting wax and foraging for pecans. Doesn't make for great blog posts.

Oh, another one of those.

I have one more to go and then we will have 7 new pieces to cast. I've narrowed the selection down to two images, neither of which is remotely like the one it is replacing. I can't really remember the criteria I used when I made my original selections except that I really liked the image. I still like it but I couldn't make it work in the wax to my satisfaction and I'd rather try something new than try that one again.

We have amassed quite a lot of pecans. A big storm blew through last Monday and did an excellent job of knocking them out of the trees. It seems as if the tree that lost three large branches last year is trying to outdo itself and the other two this year. I started shelling them this week and now that I learned how to actually use the fancy pecan nut cracker I bought last year (thanks to a youtube video that I stumbled across earlier searching for nut crackers), it's going much easier. When I asked the guy at the place where I sell my extra pecans how to use it he showed me a technique that I could never get the hang of. Turns out it was completely wrong. OK, not completely wrong, just half wrong.

Last week, we had a couple of days of cooler weather and I dug up more grass along the concrete bunker over at the shop and planted some of the things I moved from the city property. Well, two things. The spider lilies and one of the rooted cuttings from the yellow angel trumpet. The little angel trumpet went into immediate wilt since it basically went from shade to full sun so right now it's being protected by shade cloth while it recovers.

We don't usually have commission work in the summer because it's too hot for one thing (and we have the grandkid visits) and our clientele is on vacation or has kids out of school. That's fine with us as long as it picks back up in the fall. Which it usually does except when it doesn't. So far this fall, there has been little activity and no results. I'm not too worried because of the sale of the city property this summer and I did want some time to work on my other work. I don't want no work, just not 6 months worth dumped on me at one time. Or maybe even that. Now that we are out here and not wasting two days out of the week traveling, it would be easier to handle.


This sweet little rain lily popped up around the yard of the new shop after one of our rains.


Friday, October 10, 2014

models (yeah, again) and the selfie


So, here's the finished model from the last post. I'm totally into the stippling for texture on these last ones.


I'm working on the last 6” x 6” model now. Each one of these is so different I need to come up with a strategy every time it seems. This one is from a picture I saved off the internet and I have no idea what kind of flower it is. Here's the pic. Anyone know what this is?


Here's my progress so far.


I try to get a few chores done in the morning or very early afternoon because once I start working on the models, I'm there till 7 PM or so, getting up now and then to rest my eyes and collect pecans.

one cubic foot of pecans so far this year


Tomorrow is the annual Wine and Art Fair on Monterrey Square. Attendees will be able to sample and buy wine and craft beer and view art in different locations and of course there will be food vendors and a band. It will be a very long day for me as I have to open the antique store at 10 AM and the fair starts at 4 PM and runs til 10 PM. I'll have help as the other two employees will be there as well as some of the vendors so I needn't stay the whole 12 hours.

Since I agreed to set up a display of our art again this year at the store and I have done everything nothing to prepare for that, that's what I'm doing today, rummaging around in the shop trying to come up with something.


Friday, September 19, 2014

today's lesson and the selfie


I thought I would give a more complete explanation of how I do my wax work, or at least how I'm doing the models for the botanicas.

I start with a square of wax 4” x 4” x 1” thick made by pouring melted wax into a prepared form or mold.


First I select my image. I have a folder full of close up pictures of flowers that I collect. Once I pick my image, I convert the photograph into a line drawing.


Next I deconstruct the line drawing into layers...bottom layer being the parts of the image that are furthest away, next layer being the next most forward elements, the third layer the next most forward elements, and so forth. It averages about 4 layers.


Then I use a copy of the line drawing to cut out each layer out of a 1/8” sheet of wax. We make these by pouring melted wax on a hydrated plaster 'bat', a round or rectangular shaped slab of plaster about 1/2” thick. The wax won't stick to the hydrated plaster.


Once that is done, I stack the layers on the block and seal the edges together and the layers to the block using a rubber tipped or wood tool. Everywhere two pieces of wax come together, the join must be sealed or else plaster will flow into unwanted spaces later.


After all the layers are stacked and joined together, I have a rough, flat 3 dimensional form that is ready to be carved into it's final shape.


These are the tools I use to do that...small wire tools, large wire tools, metal carvers, and miscellaneous wood tools and rubber tipped tools.


I use them to carve away big amounts or shave away small amounts. Sometimes I add wax and reshape.


When I'm satisfied with the main carving, then I go back with my small wire tools and make small adjustments.

Sometimes, depending on the piece, I will go over the finished carving with 'scrubbie' after all the carving and cleaning up is done before I smooth it all out, which I have done here.


The last step is smoothing the wax. For this I use naptha, a solvent like lighter fluid. Using either my finger tips or a small piece of chamois or the rubber tipped tools, I try to go over the whole surface. Finally, I textured the stamens by stippling them with a small tool.


I kind of hurried on this one as I wanted to finish it today for the post but also because tomorrow I work at the antique store and I don't want it to linger. I'll go over it one more time as I can see a few areas that need attention but this one is done.

And so am I.